Interested in building amazing web pages? It is now easier than ever with Elementor and WordPress. This page will go over how to get started building a page with Elementor page builder.
Step 1. Create New Post or Page
Go to the dashboard of your WordPress website and click “Add New” under Posts or Pages. For this tutorial, we’ll make a new page.
Step 2. Edit with Elementor
Once you get to this screen, you can choose to edit the page with the default WordPress editor. To use Elementor, you should first enter a Page Title (1) and then click the Edit With Elementor (2) button.
Step 3. Create Structure
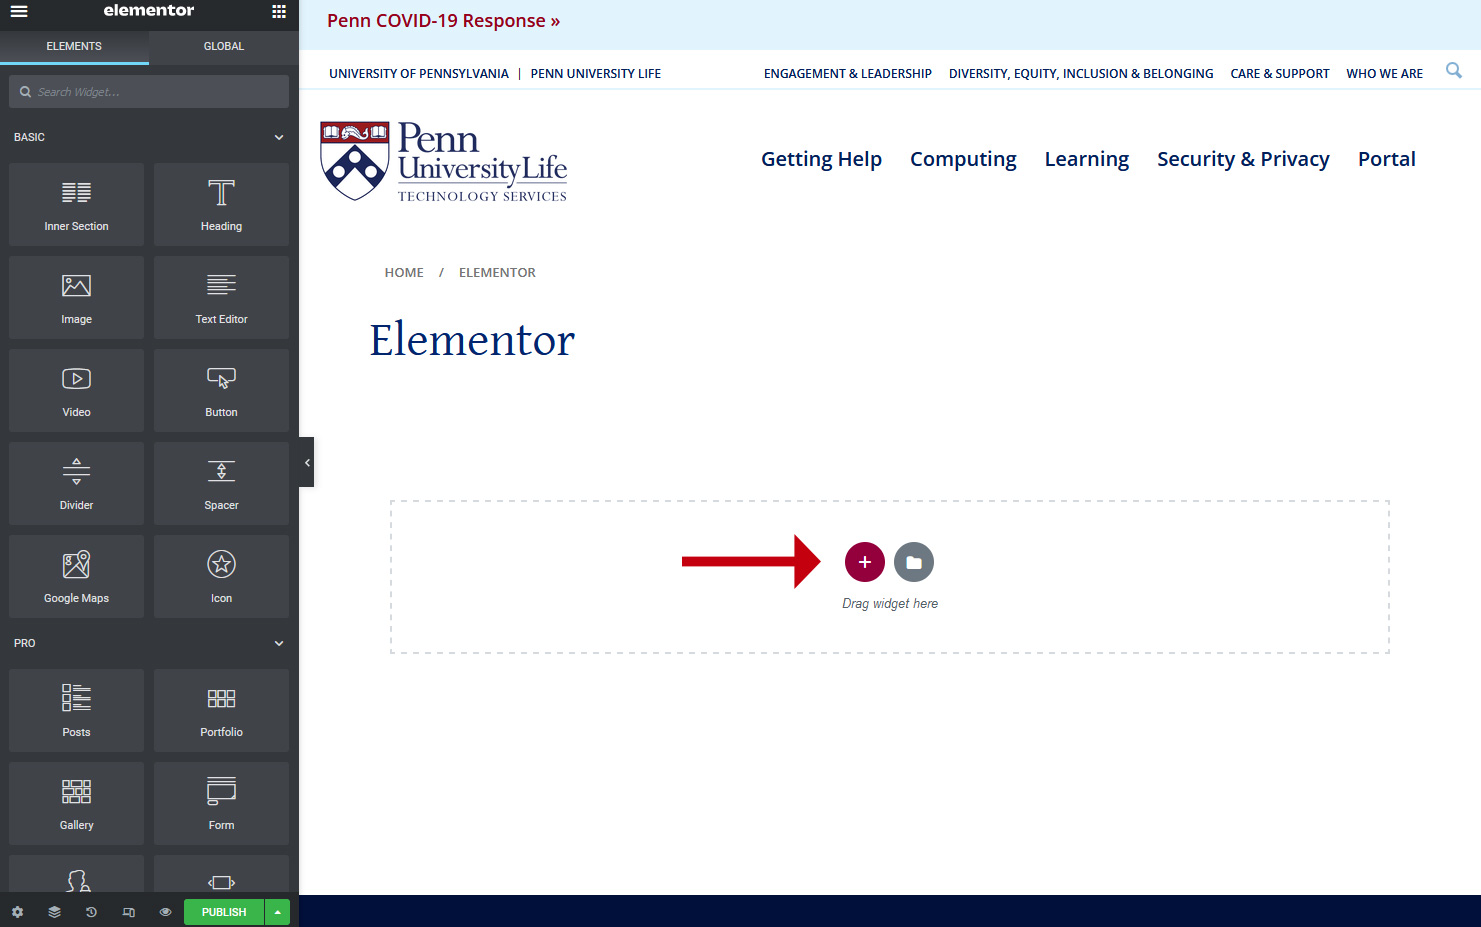
This page will be empty initially. Click the “plus +” button to customize the structure of that section of your page.
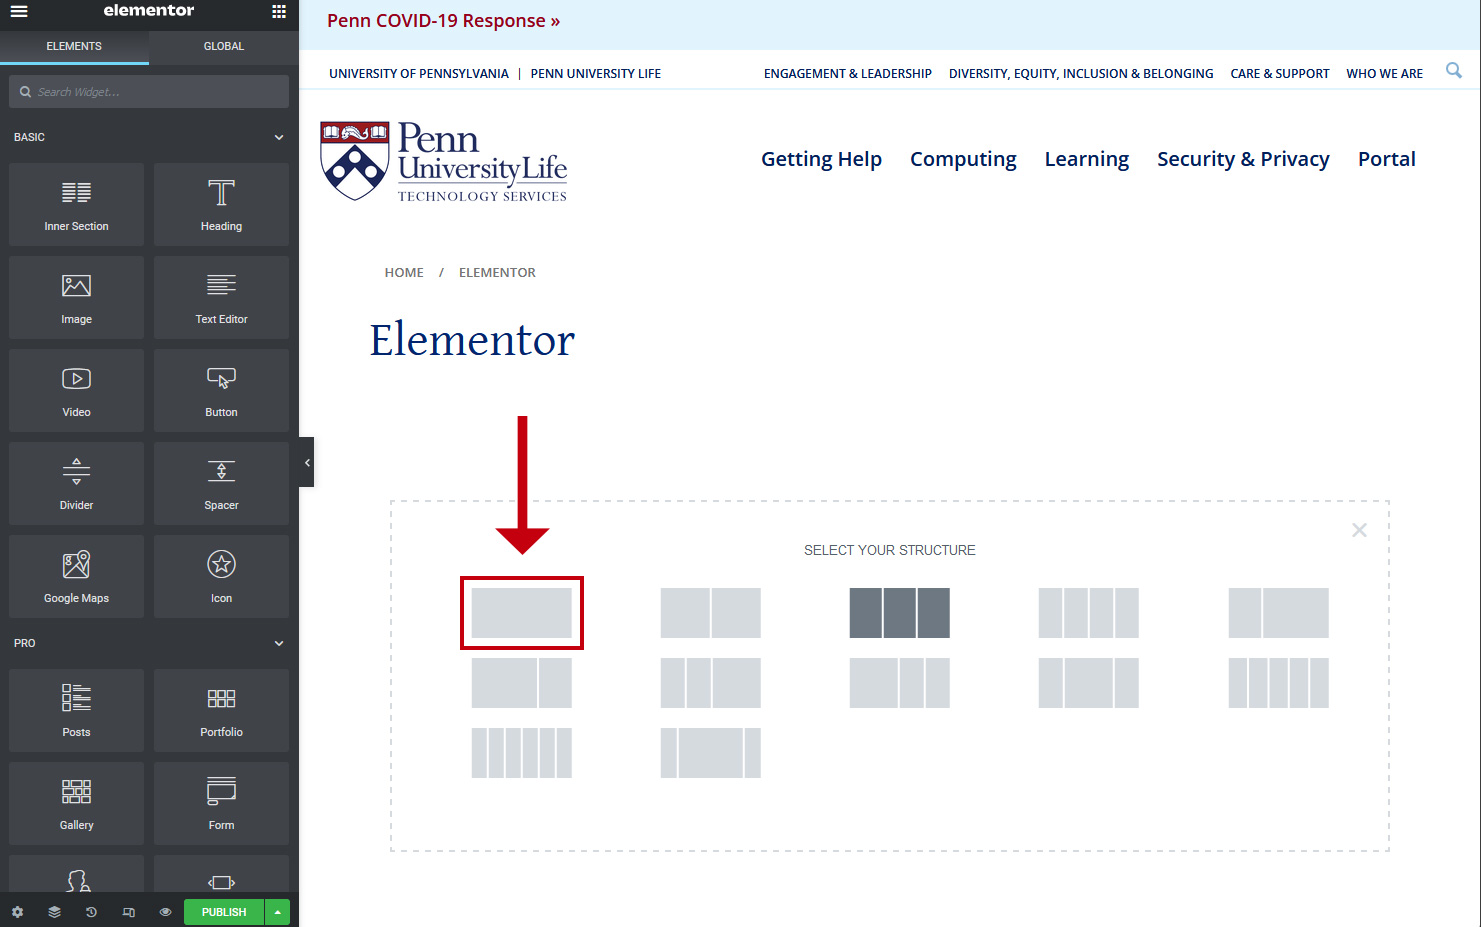
After you’ve clicked the plus button, you’ll see an option to “Select Your Structure”. Let’s go with the single column for this example.
After we click that icon with the single column, we now see a brand-new section on the page with one single column, and a plus button. Click the “plus +” button.
Now we’ll want to start populating our page with content. From here, you can begin dragging content from the Elements section on the left-hand side of the page onto your empty column.
All you have to do is click on the box such as “Heading” then hold down the mouse button, and drag it to the element on the page.
Step 4. Edit Settings
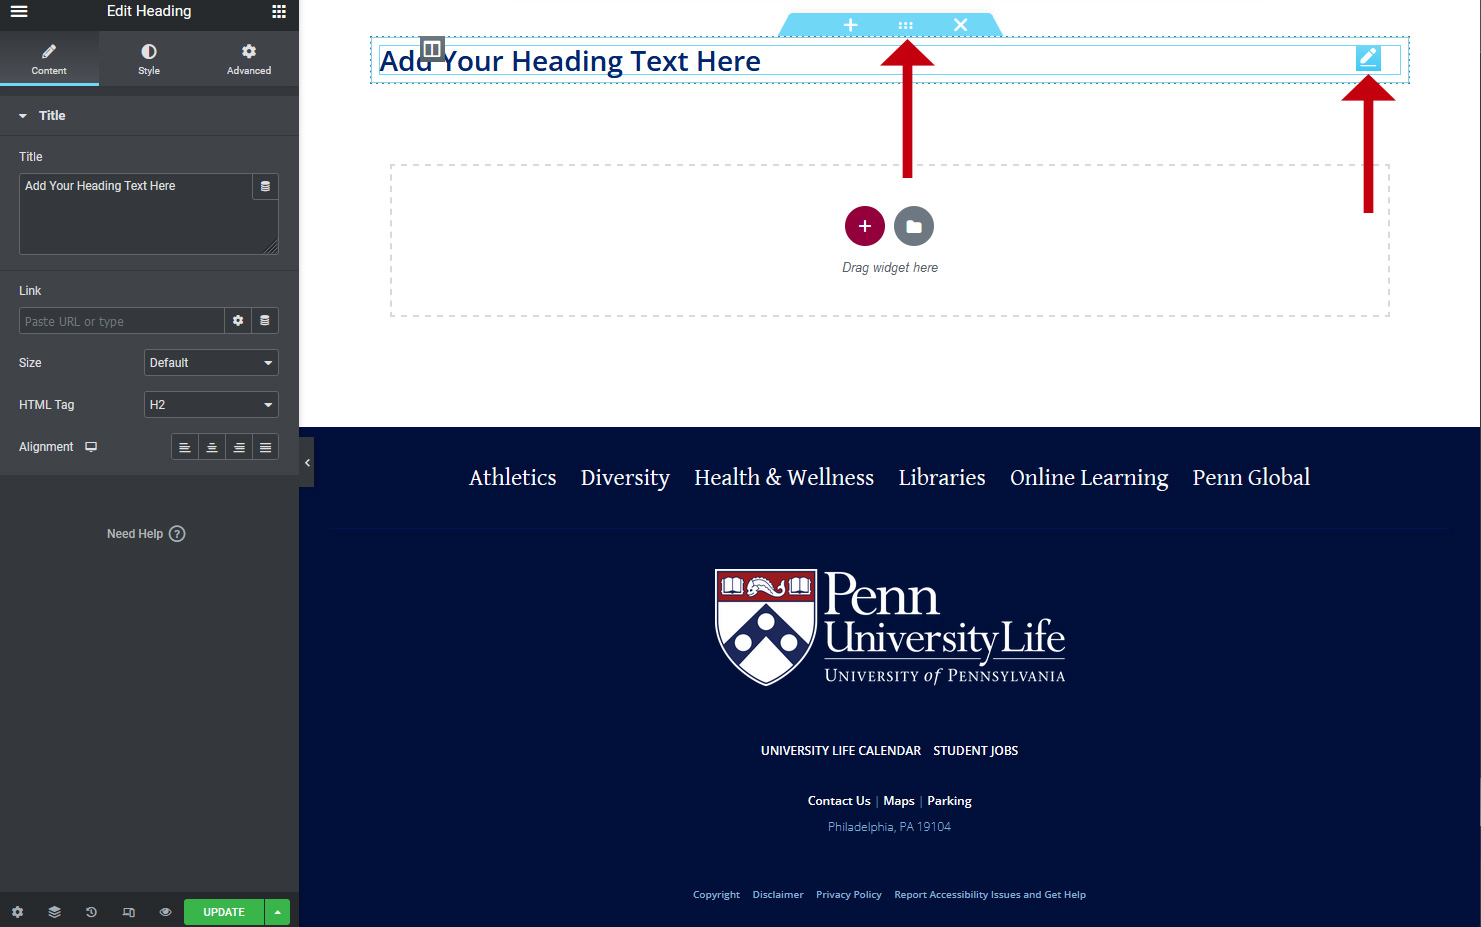
For every section or element you place on the page, you will have options to customize it further. Just look for the six dots or the pencil icon when selecting a section or element.
If we select the heading, for example, we can change its content, style, or advanced features like margins and padding, responsiveness, and so on.
Step 5. Preview and Publish Your Page
Once you’re happy with your content and settings, you can preview the page.
Toward the bottom left, you’ll find a “Preview Changes” icon to view how your page will look once it is published.
If your page looks good, you can be confident that it looks exactly like it did while you were editing it. Click “Publish” to publish your content.